
A MacBook repair shop will always help you with everything, including the initial setup of your Mac. However, if the nearest one is a long way off, or you simply can't find the time, here is how to transfer data to a new Mac and how to restore a Mac from a backup.
With Migration Assistant, you can copy all your existing documents, the apps you use, your family's user accounts and even the settings from your old computer to your new Mac. This feature copies all your files so that you don't have to do it by hand with flash drives, external drives and cloud storage.
First steps
It's a good idea for both of the Macs you want to transfer data between to be running the most up-to-date software possible. Check for updates in the Mac App Store, and also check that your old Mac has a name. If it doesn't, go to System Preferences, click Sharing and check what's in the Computer Name field. Then connect both to mains power so that they don't run out of juice during the transfer – assuming they're MacBooks, of course.
If both computers are running macOS Sierra or later, just place them next to each other and turn on Wi-Fi on both. If either of them is still running OS X El Capitan or earlier, connect them to the same Wi-Fi or Ethernet network. For a faster and more stable transfer, though, you can also connect them in target disk mode using a suitable cable or adapter.
Migration Assistant
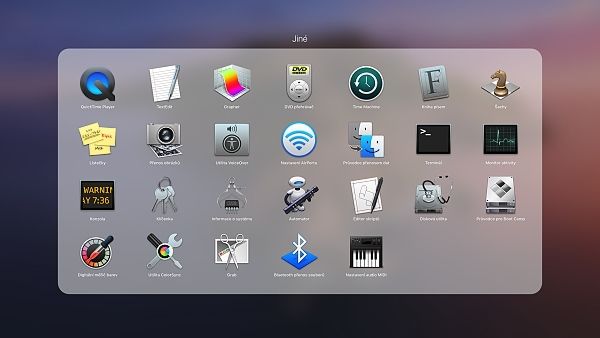
On your new Mac, open Migration Assistant, which you'll find in the Applications -> Utilities folder or in Launchpad, in the Other folder. Click Continue and choose the appropriate option (in our case, moving from an old Mac to a new one, it's the first one). Click Continue again.
The Other folder in Launchpad hides quite a lot. Besides Time Machine backup, it's also where the Migration Assistant app lives.
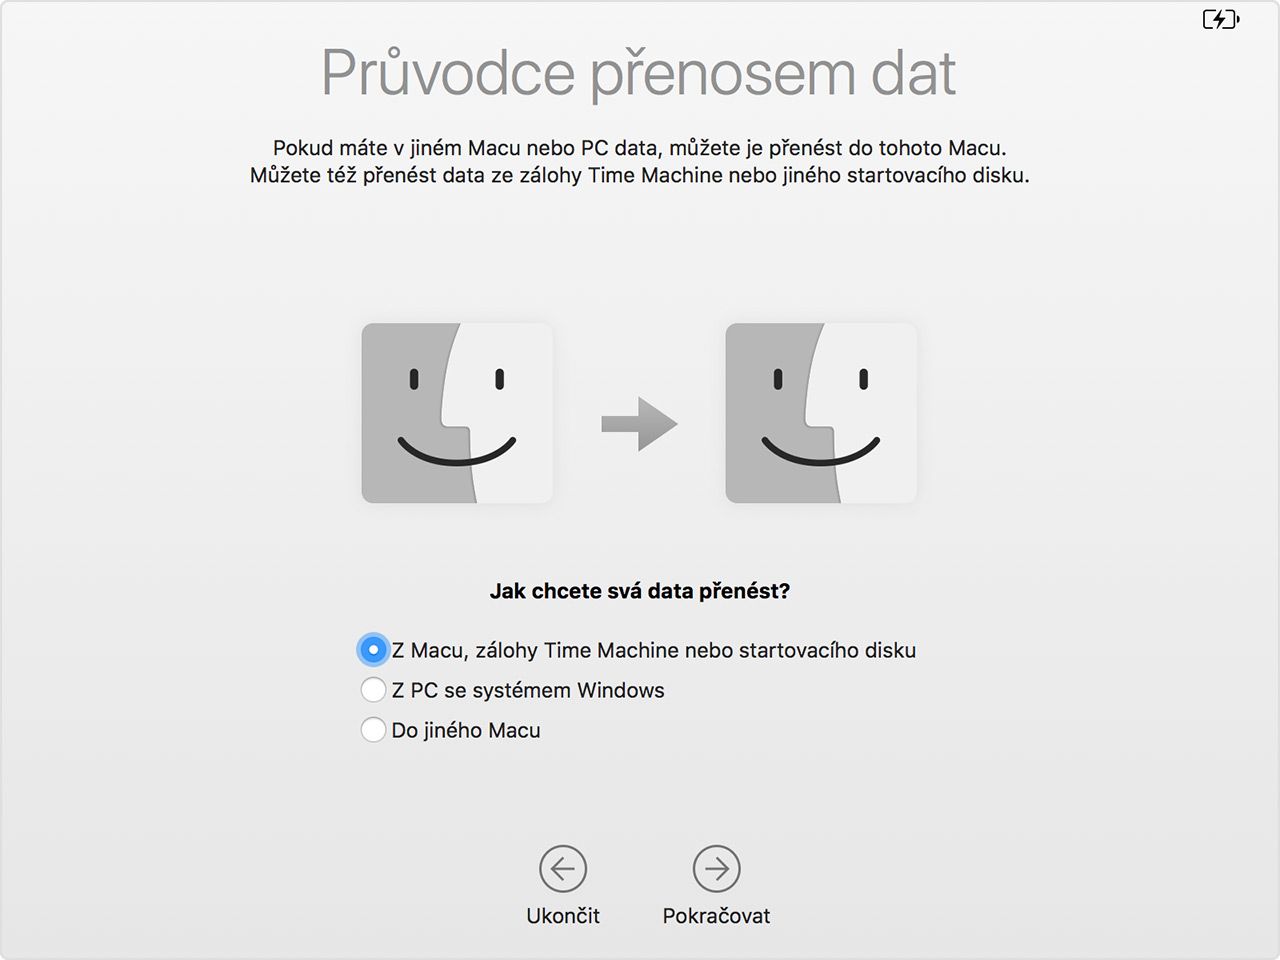
Launch Migration Assistant on the old computer as well, click Continue, and here choose the third option, i.e. “To another Mac”, then choose Continue again.
If you have any questions or need advice, come and talk to the experts at appleguru.cz
Yes, you can transfer data to a Mac from Windows as well.
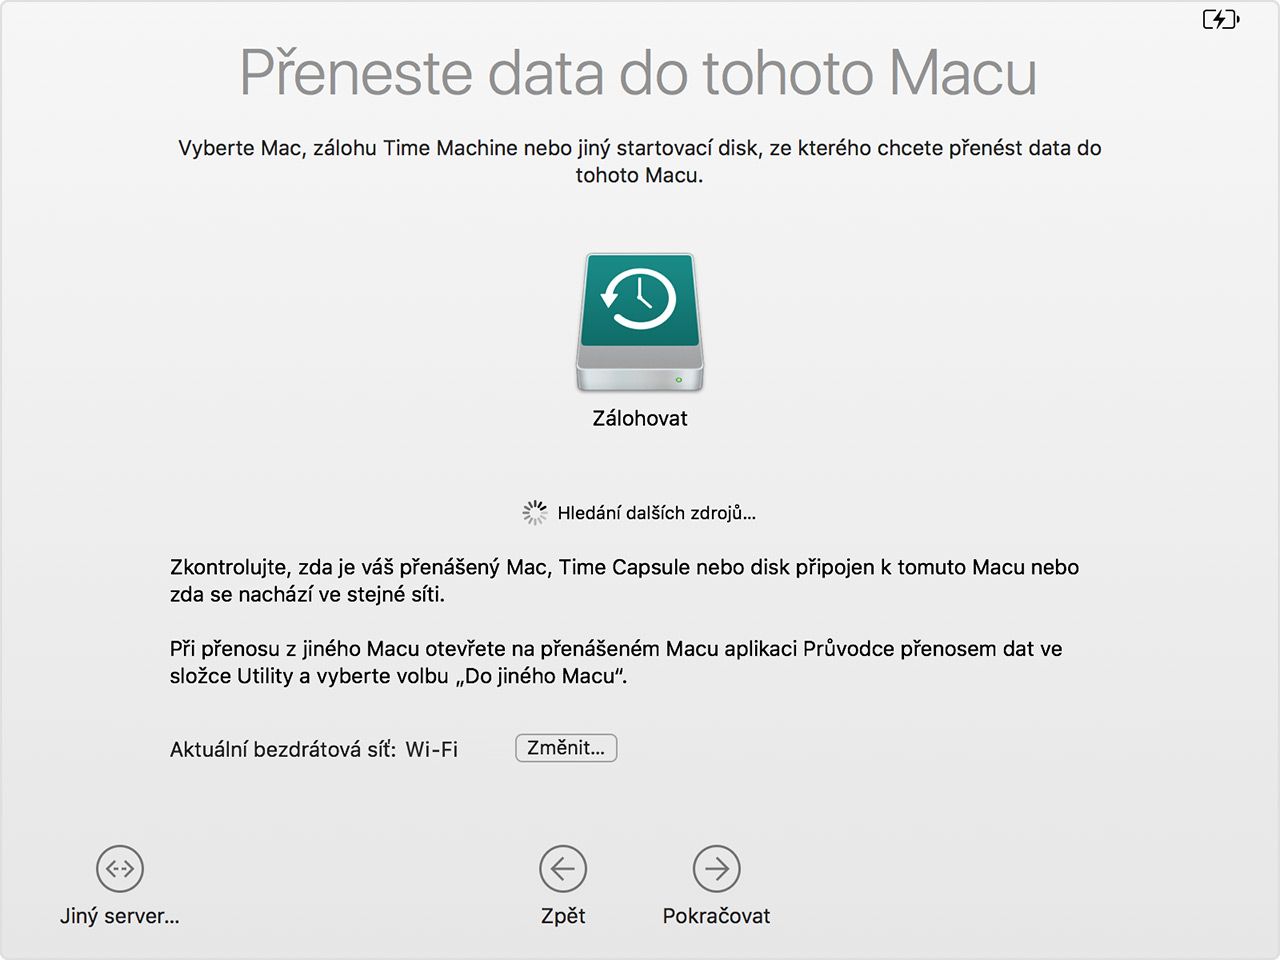
On the new Mac, you'll then be asked to select a Mac, a Time Machine backup or another startup disk, so click the relevant icon and then Continue. You may see a security code here. It should match the one shown on the old Mac. Confirm it by choosing Continue.
In any case, the Migration Assistant app keeps telling you what to do.
On the new Mac, you should see a list of backups sorted by date and time. Select the account you want to use and choose Continue. Next, you select the data you want to transfer. This can be applications, the user's data, other files and folders, and computer and network settings.
If you don't want to transfer your applications, say, because you perhaps no longer use them, you don't have to.
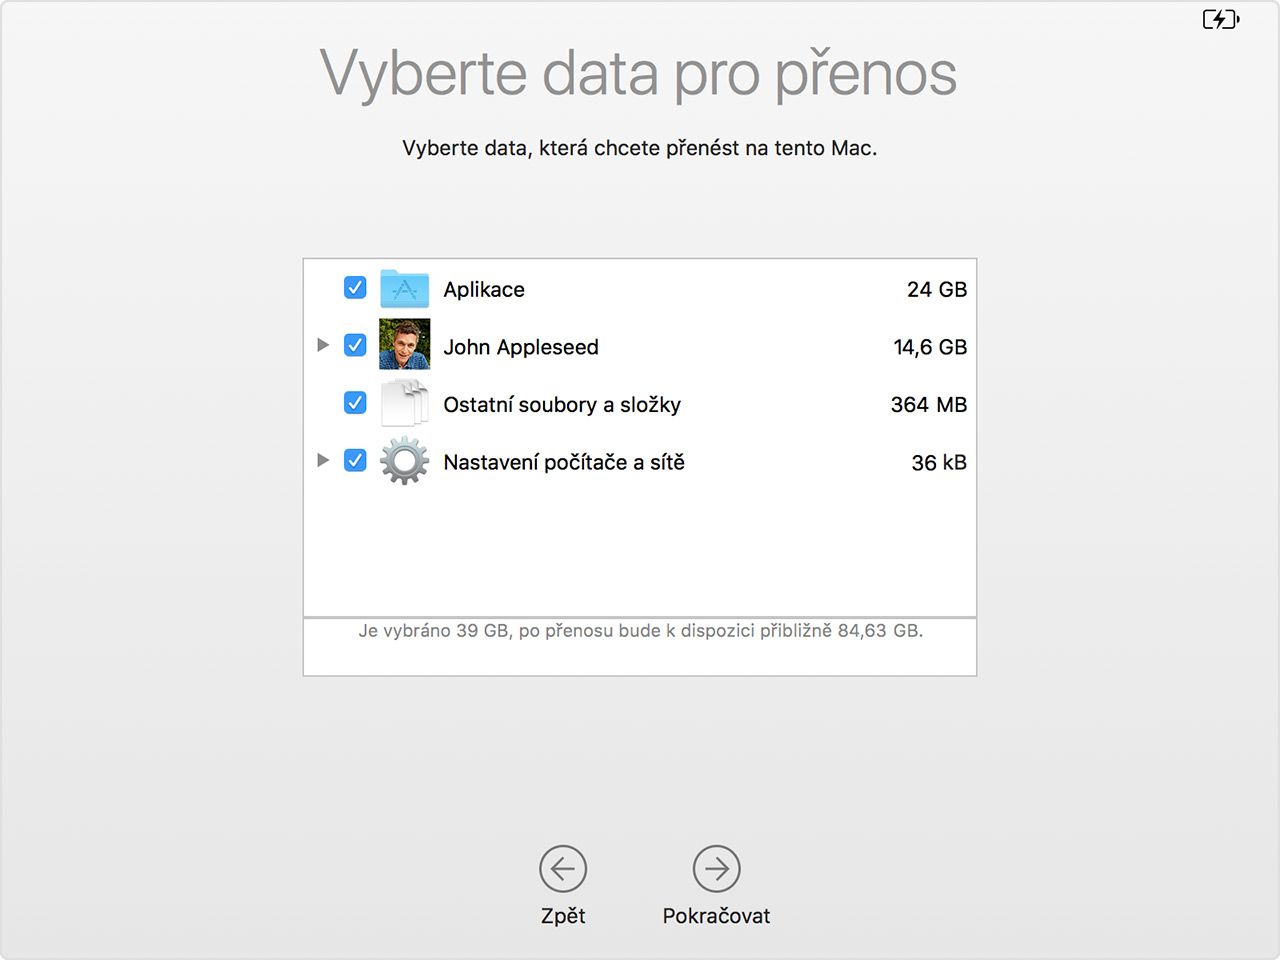
Click Continue to start the transfer. If you have a lot of data, the transfer can take several hours. The speed also depends on the type of connection you've chosen between the computers. Once Migration Assistant has finished, you can log in to the transferred account on the new Mac and work with its files.
We'll help you – come and get advice from the experts at appleguru.cz
If you're transferring an account with the same name as your account on the new Mac, which you may already be using, you'll be asked to rename the old account or replace the account of the same name on the new Mac. If you rename the old account, it is transferred to the new Mac as a separate user with its own home folder and login details. If, on the other hand, you replace the new one, the account on the new Mac is overwritten – including all its data, such as the home folder – by the account from the old Mac. That means losing all of its data.
If this happens to you by mistake, you can still restore the account from a backup. If you don't know how to go about it, you can turn to a Mac repair shop; but if you use Time Machine backups, read on to find out how to work with them.
Restoring a Mac from a backup
If you've backed up your Mac with Time Machine, you can restore your files from that backup. This can come in handy after the original files have been deleted from your Mac, or after the hard drive (or SSD) in your Mac has been erased or replaced, for example if your MacBook needed a repair, etc. When you restore from a Time Machine backup, you can restore all your files, or the Mac's entire operating system (macOS) together with all your files.
The options and the procedure are very similar to moving from an old Mac. Here, of course, all you need is a single computer and the backup you want to restore. That's because you do this with the Migration Assistant app too. So launch it and click Continue. When you're asked how you want to transfer your data, select the option to transfer from a Mac, Time Machine backup or startup disk. Then click Continue, select the disk with the Time Machine backup and continue once more.
When you're asked to choose from a list of backups sorted by date and time, select the backup you want and click Continue. Select the information you want to transfer and click Continue to start the transfer. If you have a lot of data, the transfer itself can take several hours here too. When the transfer is complete, restart your Mac and log in to the transferred account to see its files.
Restoring macOS and your files
This is a more complicated procedure, mainly because the entire hard drive is erased and then the backup is used to restore your files and the specific version of macOS you were using at the moment the backup was made. It's also a way of getting round unsuitable updates if some of your apps don't work in the new system (e.g. 32-bit apps in macOS Catalina, etc.). After all, not even a MacBook repair shop can help you with apps that don't work.
Recovery mode and the Utilities menu for the installed version of macOS.
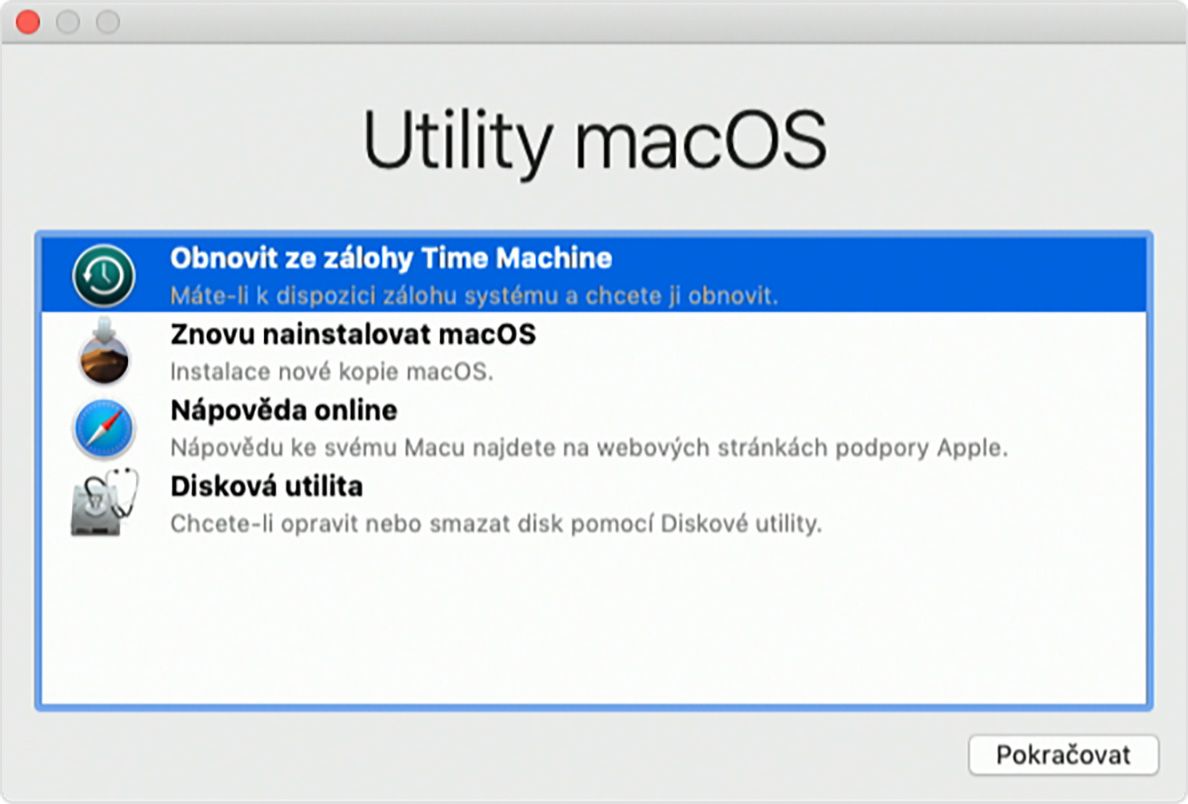
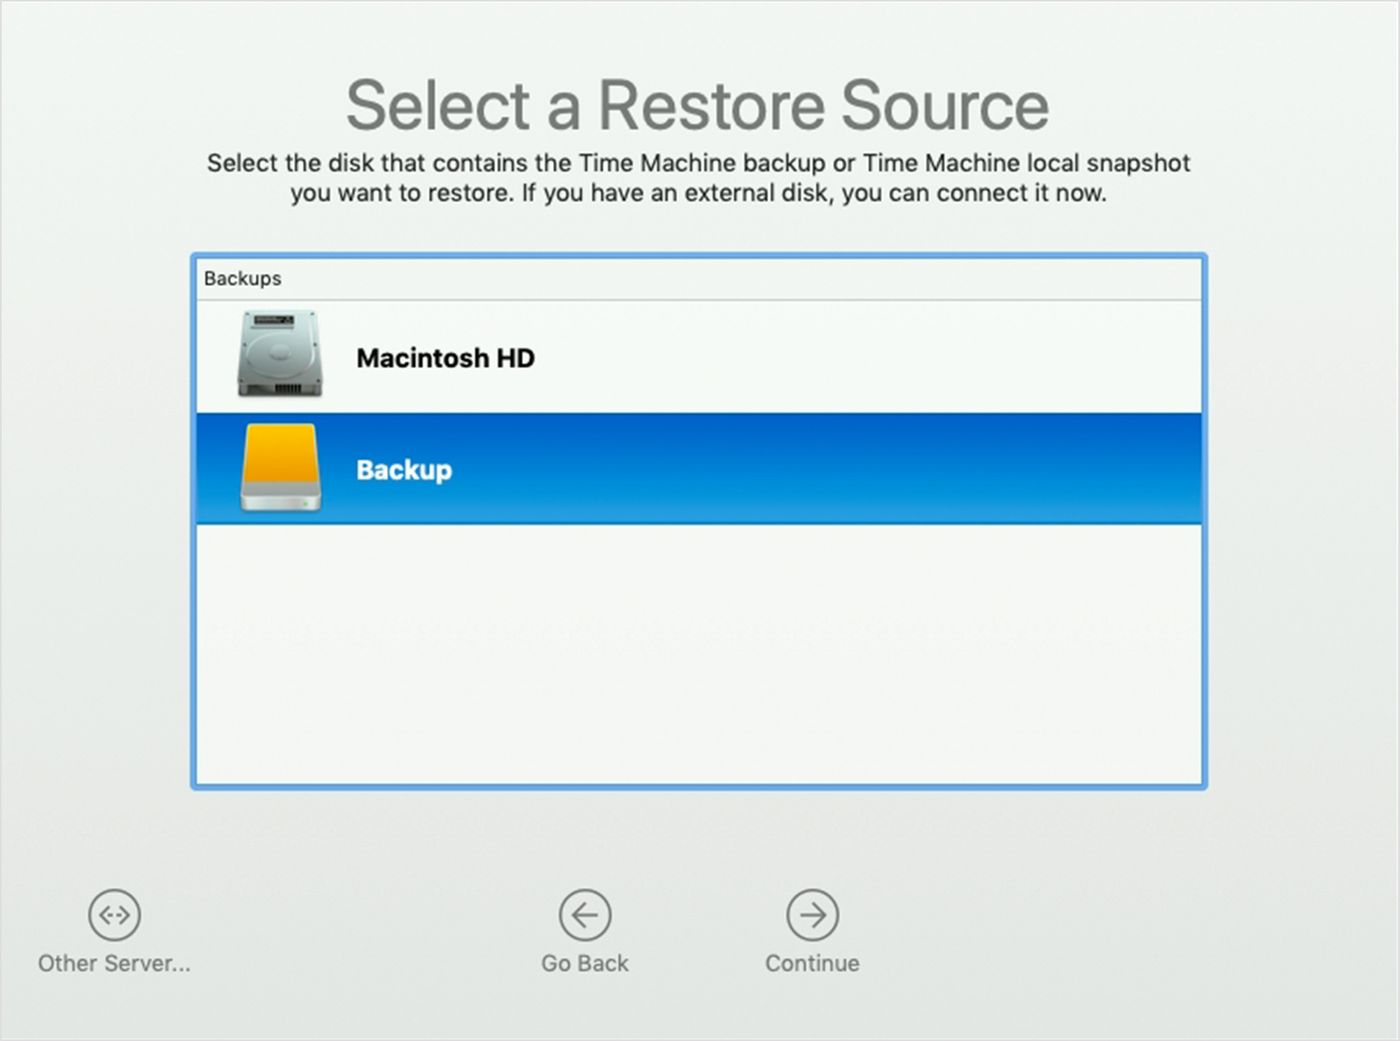
Immediately after turning on your Mac, press and hold the Command and R keys so that the computer starts up in Recovery mode. When the macOS Utilities window appears, choose the option to restore from a Time Machine backup. Click Continue twice in a row and, as the restore source, select the backup disk on which your Time Machine backup is stored; confirm this step with Continue again.
By choosing the disk, you tell the system where to look for the backup. You then pick the backup you want to restore according to the date it was created.
Select the hard drive in your Mac (or another destination disk) that the contents of your backup should be copied to, and click Restore or Continue. If FileVault is turned on on your Mac, you'll be asked to unlock the disk. Enter your Mac's administrator password and click Restore. When the restore has finished, all you need to do is restart your Mac. This MacBook fix is fairly easy, but it too takes a while. So don't rush the data restore – if you have a large amount of data, it will simply take some time. The whole procedure applies to all Apple computers.