
If you hear the magic word “backup” from every corner and still aren't doing it, perhaps it really is time to rethink your approach. Apple devices offer a simple way to get it done in a moment, and afterwards you can sleep soundly. Why? Because you'll know that you won't lose your holiday photos, the time-lapses of your growing children, your favourite films, your music or your work files, even if your machine departs for silicon heaven. You can of course visit a MacBook repair shop, but data recovery costs money and isn't always successful.
In that situation there are ways of rescuing something even from a damaged drive, but if someone steals your Mac – a MacBook in particular – while you're travelling, or you simply leave it behind on public transport, you're very unlikely ever to get it back. Ideally, then, you should keep your data in three places.
- The first is the device you created it on or download it to (phone, computer).
- The second is some kind of external medium that you keep at home (a NAS, an external hard drive and so on).
- The third is ideally a cloud service that stores the data away from your home.
The reason is the risk of burglary or a natural disaster – if you live near a river or stream, definitely don't keep your electronic backups in the cellar. If you don't want to use the cloud, you can simply keep another external drive with all your data at a relative's home.
Would you like advice on backing up your data and keeping it safe? Get in touch with our Mac specialists
Backing up your Mac with Time Machine
Time Machine is a built-in feature of your Mac that you can use to automatically back up all your files, including apps, music, photos, emails, documents and system files. Once you have a backup, if the original files are deleted from your Mac, or the hard drive (or SSD) in your Mac is erased or replaced, you can restore the files on your Mac from the backup.
To create backups this way, you need an external storage device. Once you connect the device and select it as your backup disk, Time Machine automatically makes hourly backups for the past 24 hours, daily backups for the past month and weekly backups for all previous months. When the backup disk fills up, the oldest backups are deleted. It's automatic and simple, and you can always find the data you need.
When you connect an external drive directly to your Mac, you'll probably be asked whether you want to use it to back up with Time Machine. It's best to select Encrypt Backup Disk, so that no unauthorised person can open it, and then click Use as Backup Disk. Only users who know the password can get into an encrypted backup.
The larger the drive, the more backups it can hold. It's worth dedicating the whole drive to this job, though, and not asking it to store other data as well.
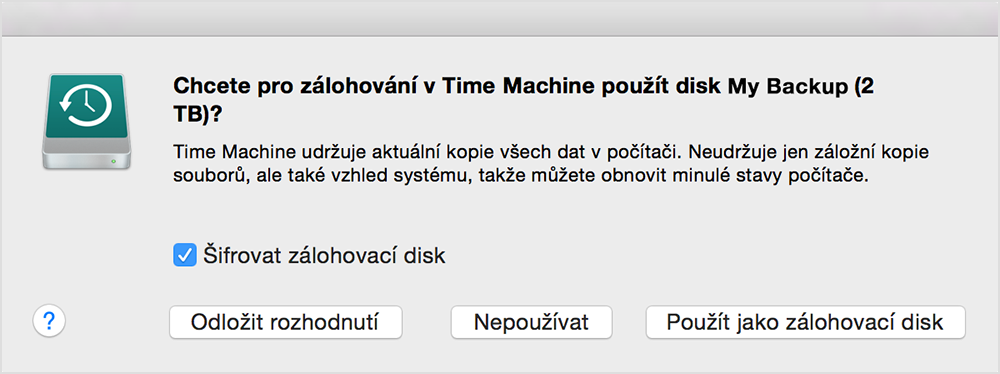
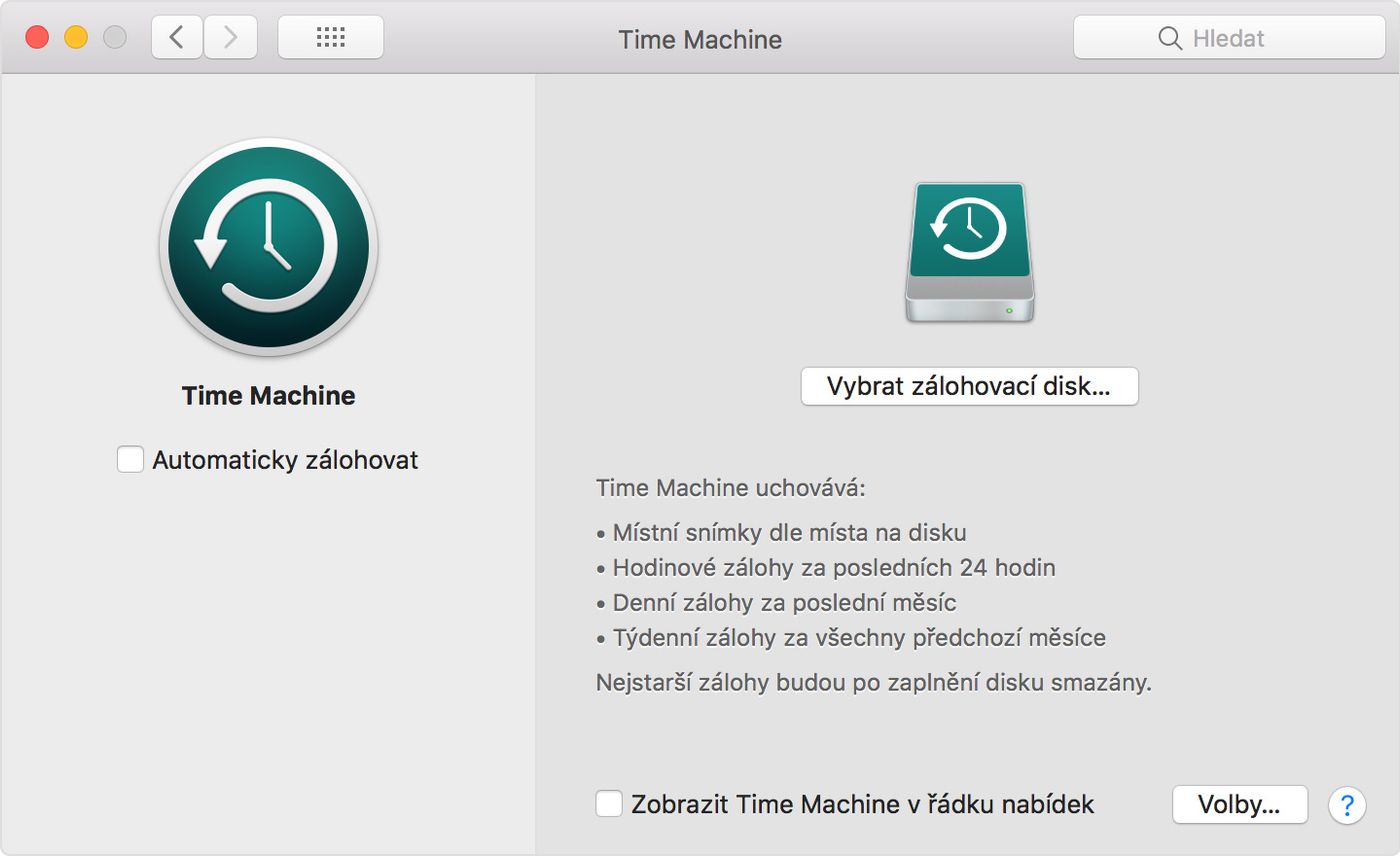
Sometimes the drive doesn't trigger the prompt. You can set it up manually, though. Just go to System Preferences -> Time Machine and click Select Backup Disk (or Select Disk, or Add or Remove Backup Disk), as shown in the picture below.
Not being offered the option to use the connected drive with Time Machine automatically? Select it manually in System Preferences.
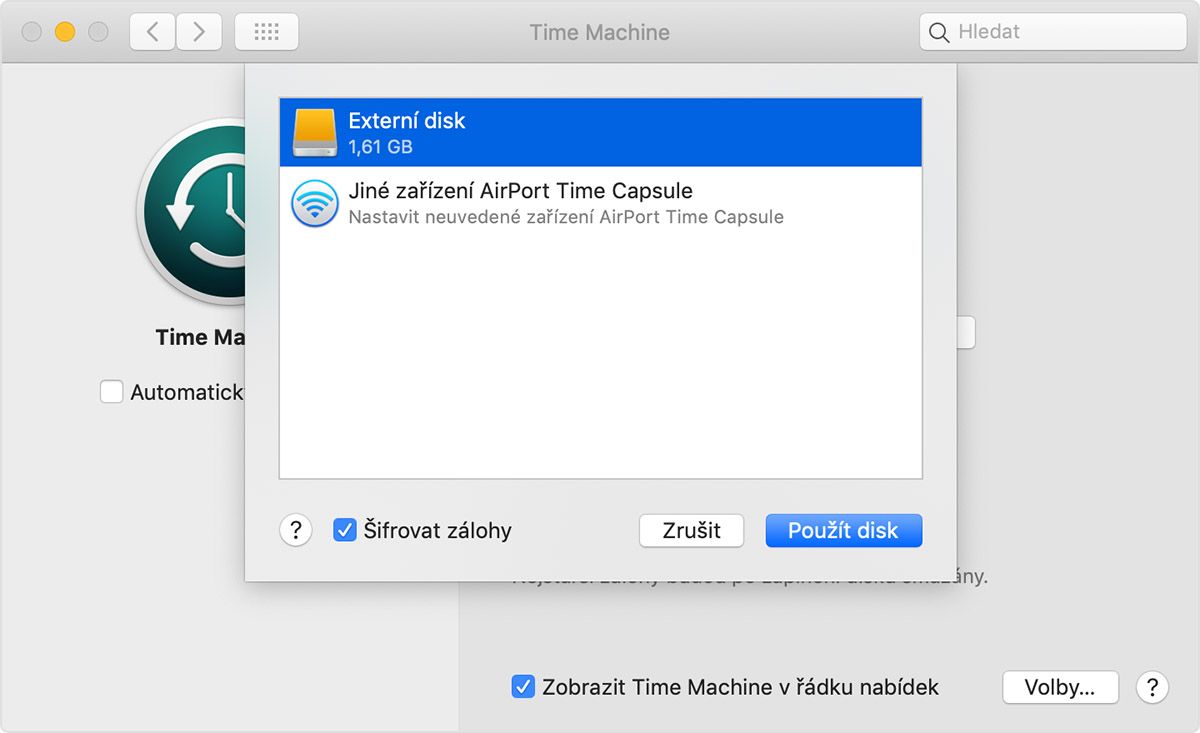
Then choose the external drive you've connected (or prefer) from the list of available disks. On the left you'll also find the option to encrypt backups. You certainly can't go wrong by selecting it. Then choose Use Disk. If the selected disk isn't formatted the way Time Machine requires, you'll be prompted to erase it first. This will of course remove all the data on the backup disk, so it's better to use a new one that you've bought specifically for this purpose.
Would you like advice on looking after your Mac? Don't hesitate to get in touch with our MacBook specialists
Especially if your Mac contains sensitive private or work data, you have nothing to lose by encrypting the backup. You'll still be able to get into it afterwards, but you'll need to know the password.
Once you've selected a backup disk, Time Machine immediately starts making periodic backups – automatically, with no further action needed from you. Depending on how many files you have, the first backup can take a long time, even several hours, but you can carry on using your Mac as normal while it runs. After that, Time Machine backs up only the files that have changed since the last backup, so future backups will be noticeably faster.
To see the size of a particular file or folder, click it once and press Command and “I”. To see information about your Mac's storage, click the Apple menu in the top-left corner of the screen. Choose About This Mac and click the Storage tab. For Time Machine backups it's a good idea to use a drive with twice the storage capacity of your Mac (so if your Mac has 128GB of storage, the drive should have at least 256 GB).
iCloud Drive
Documents stored in iCloud Drive are synchronised across all your devices. That means you can easily get to them on your iPhone, iPad, iPod touch, Mac or PC, and on iCloud.com from any web browser, even on someone else's computer. The main advantage is that even if you lose all your devices, your data will still be stored safely on Apple's servers.
It's important to keep all your devices up to date so that they support iCloud Drive. You'll find all the supported devices and operating systems at this link. You also need to be signed in with the same Apple ID on all of them. Thanks to Apple's interconnected ecosystem, iCloud Drive comes in handy if you own other devices besides a Mac. So how do you set it up?
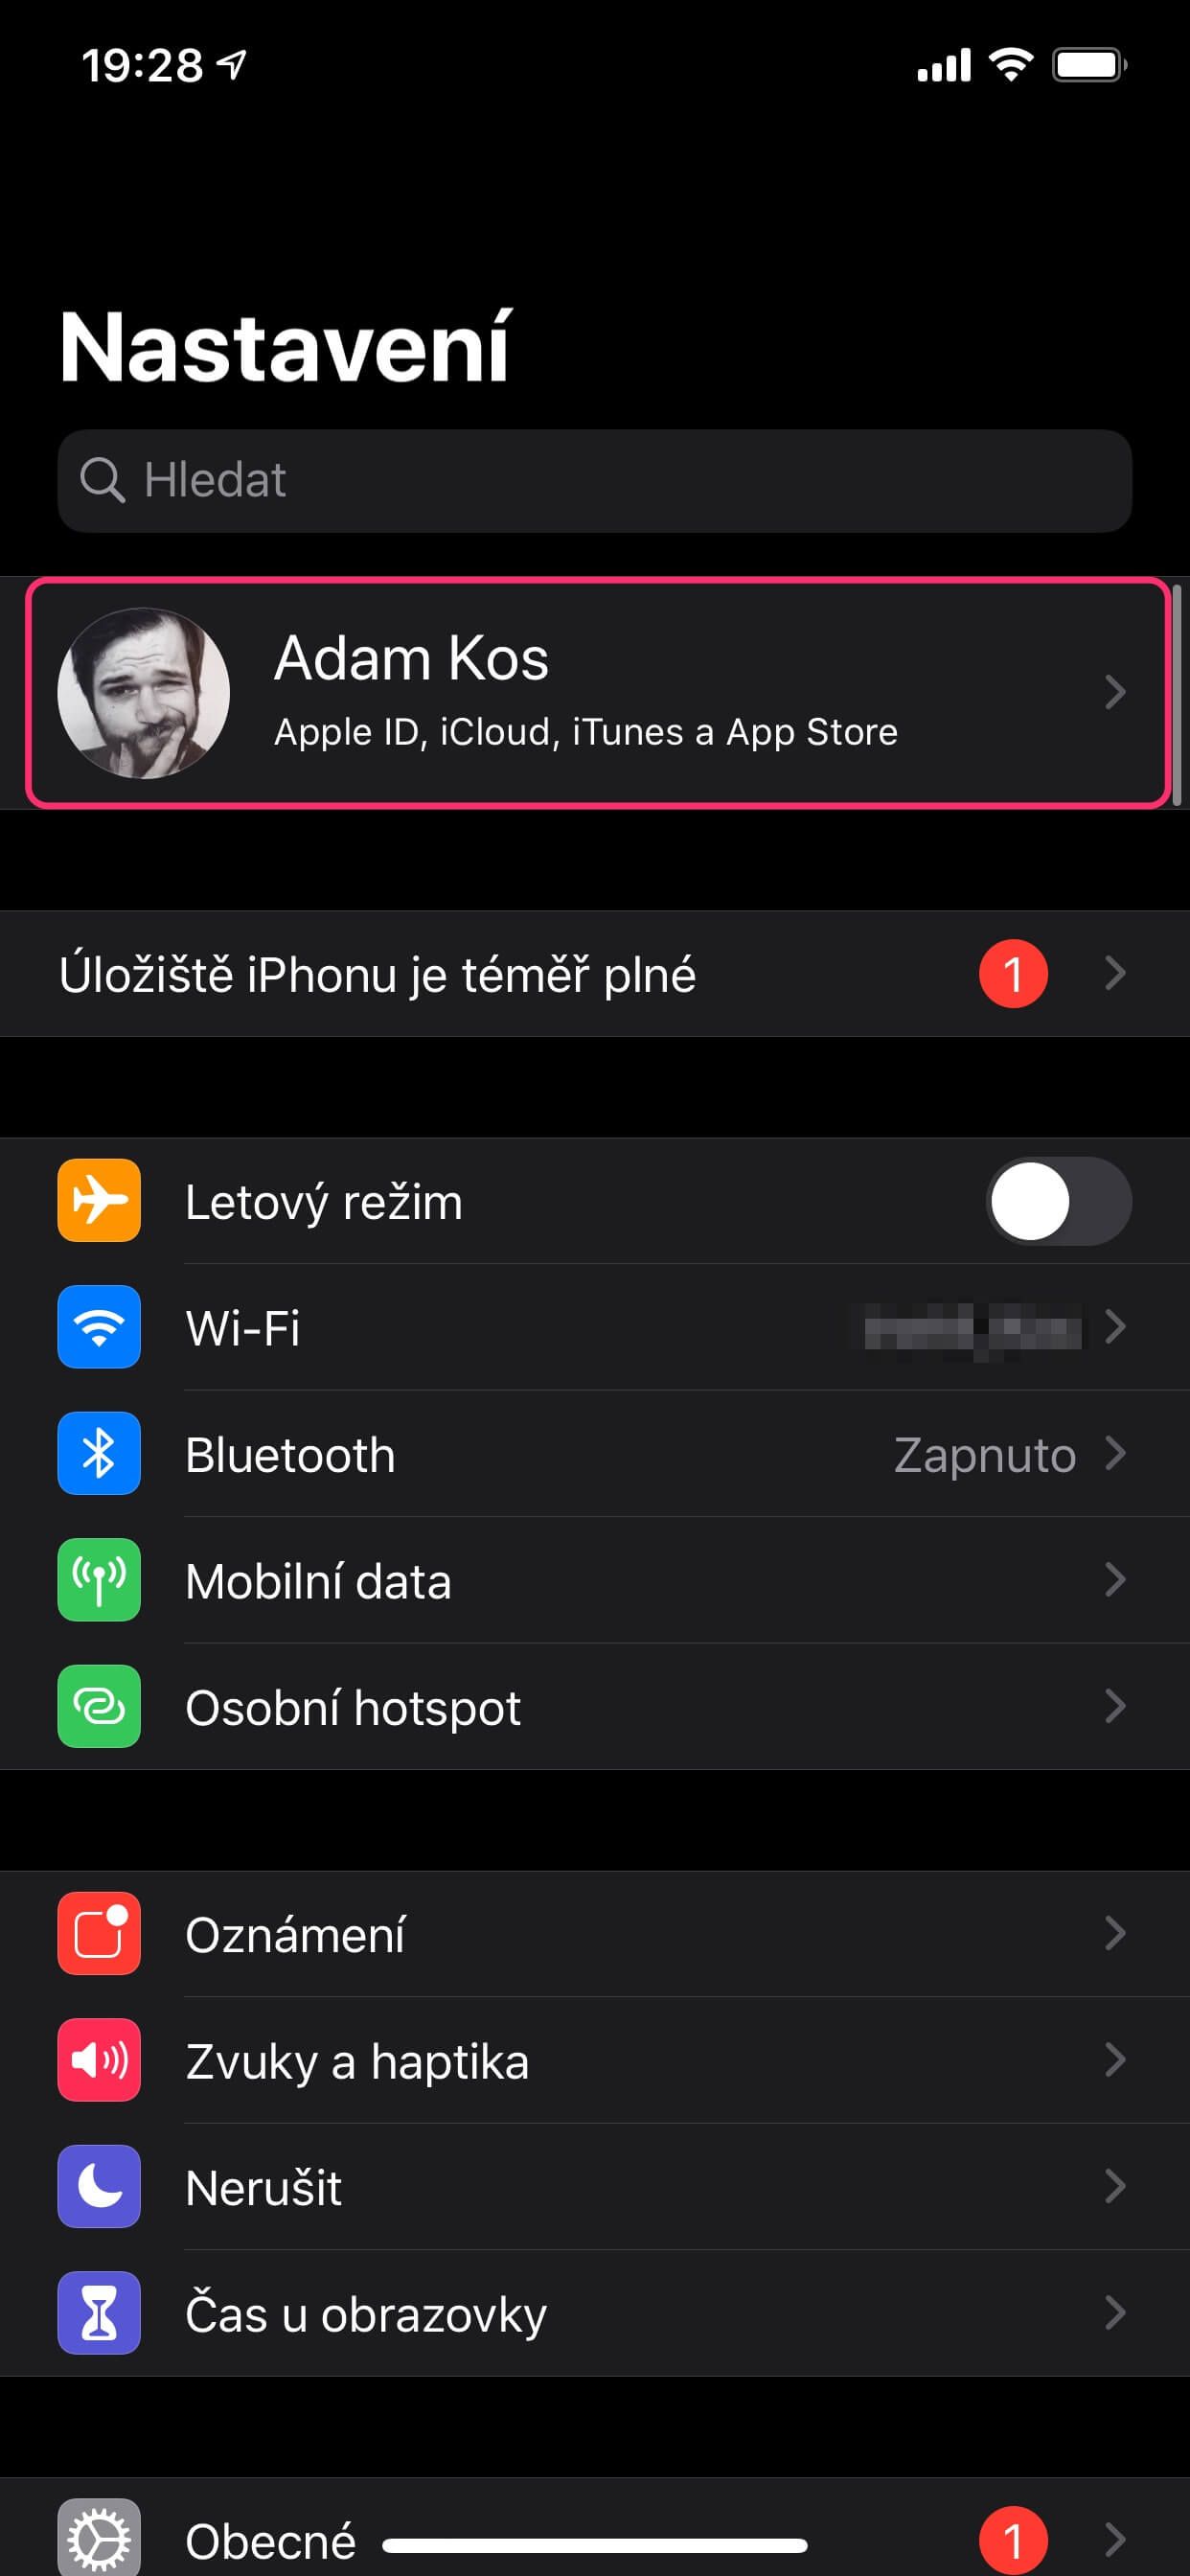
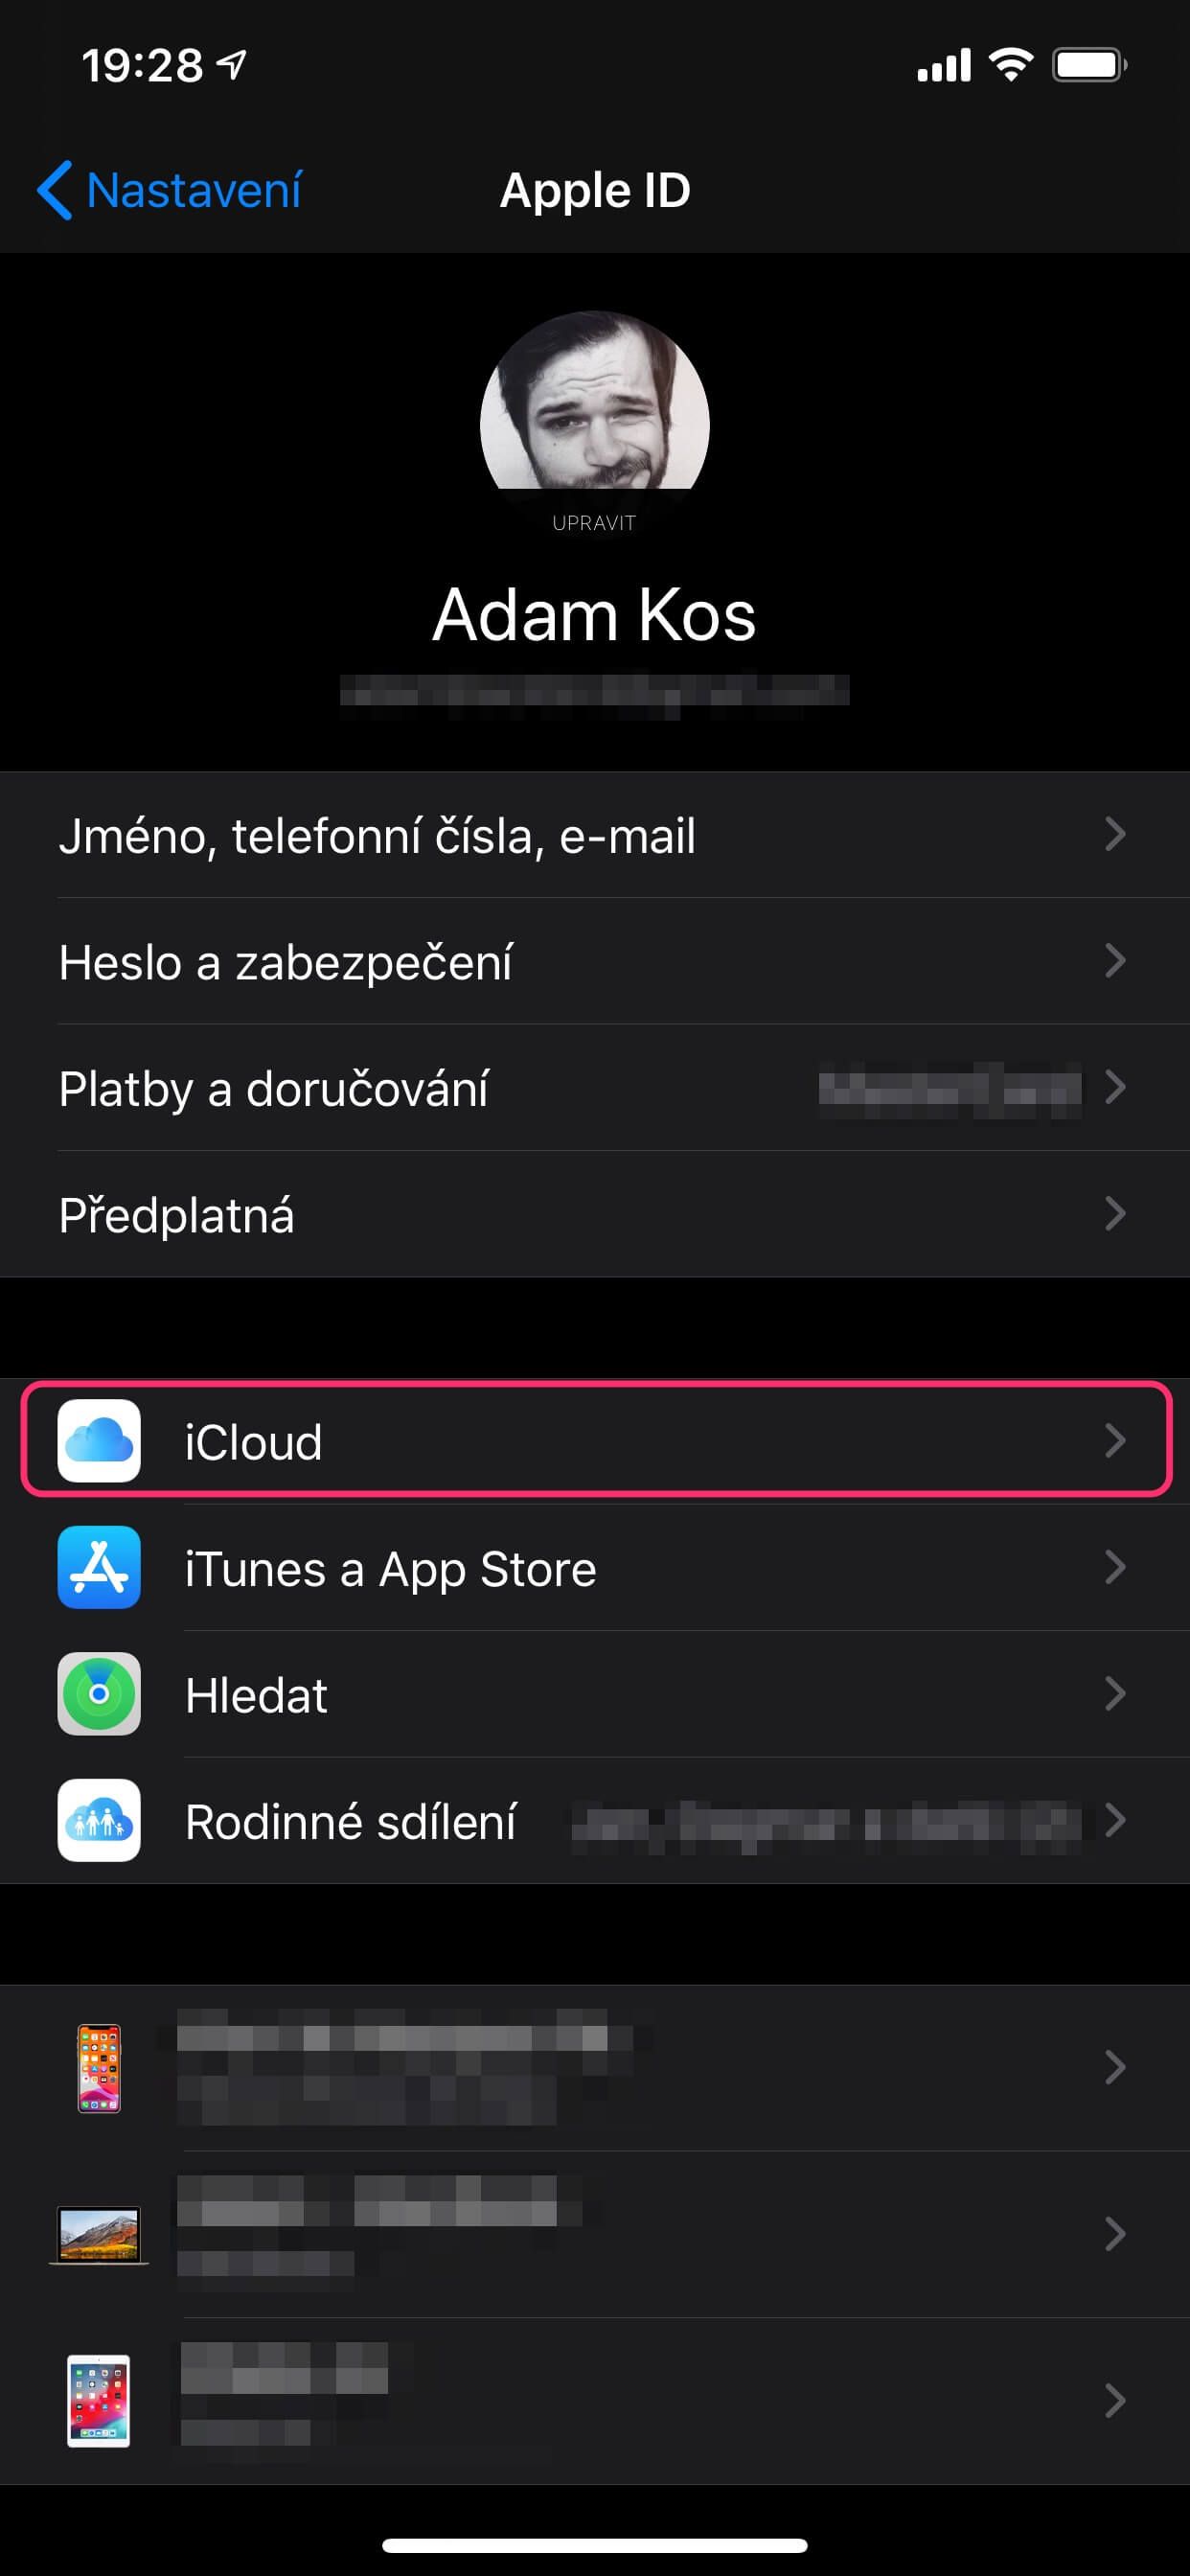
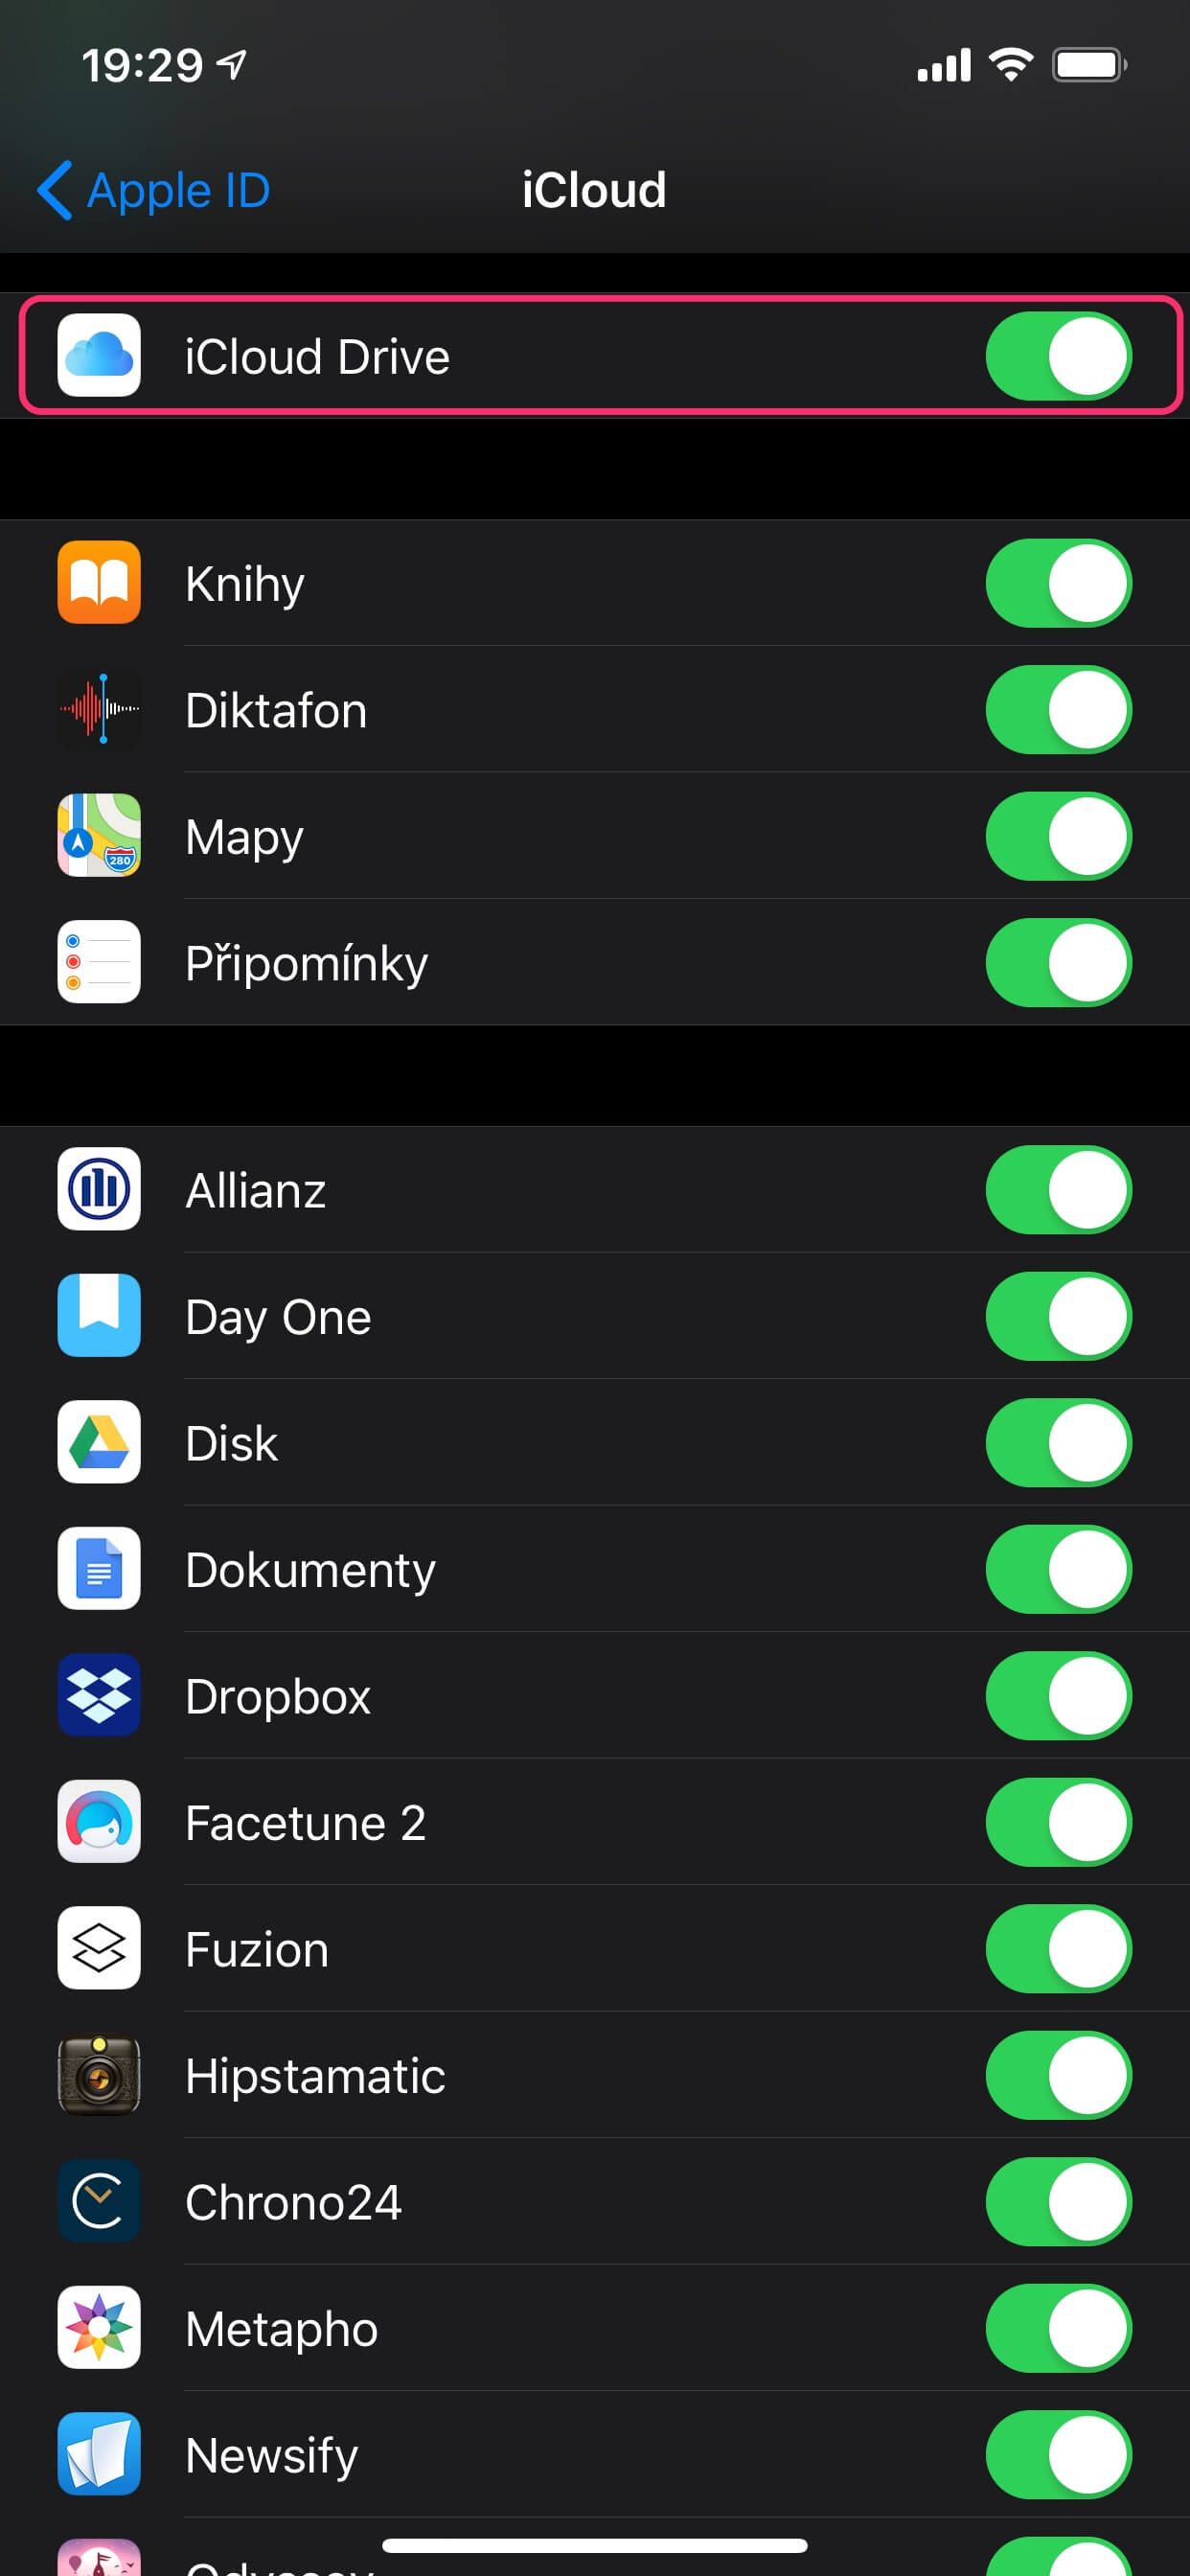
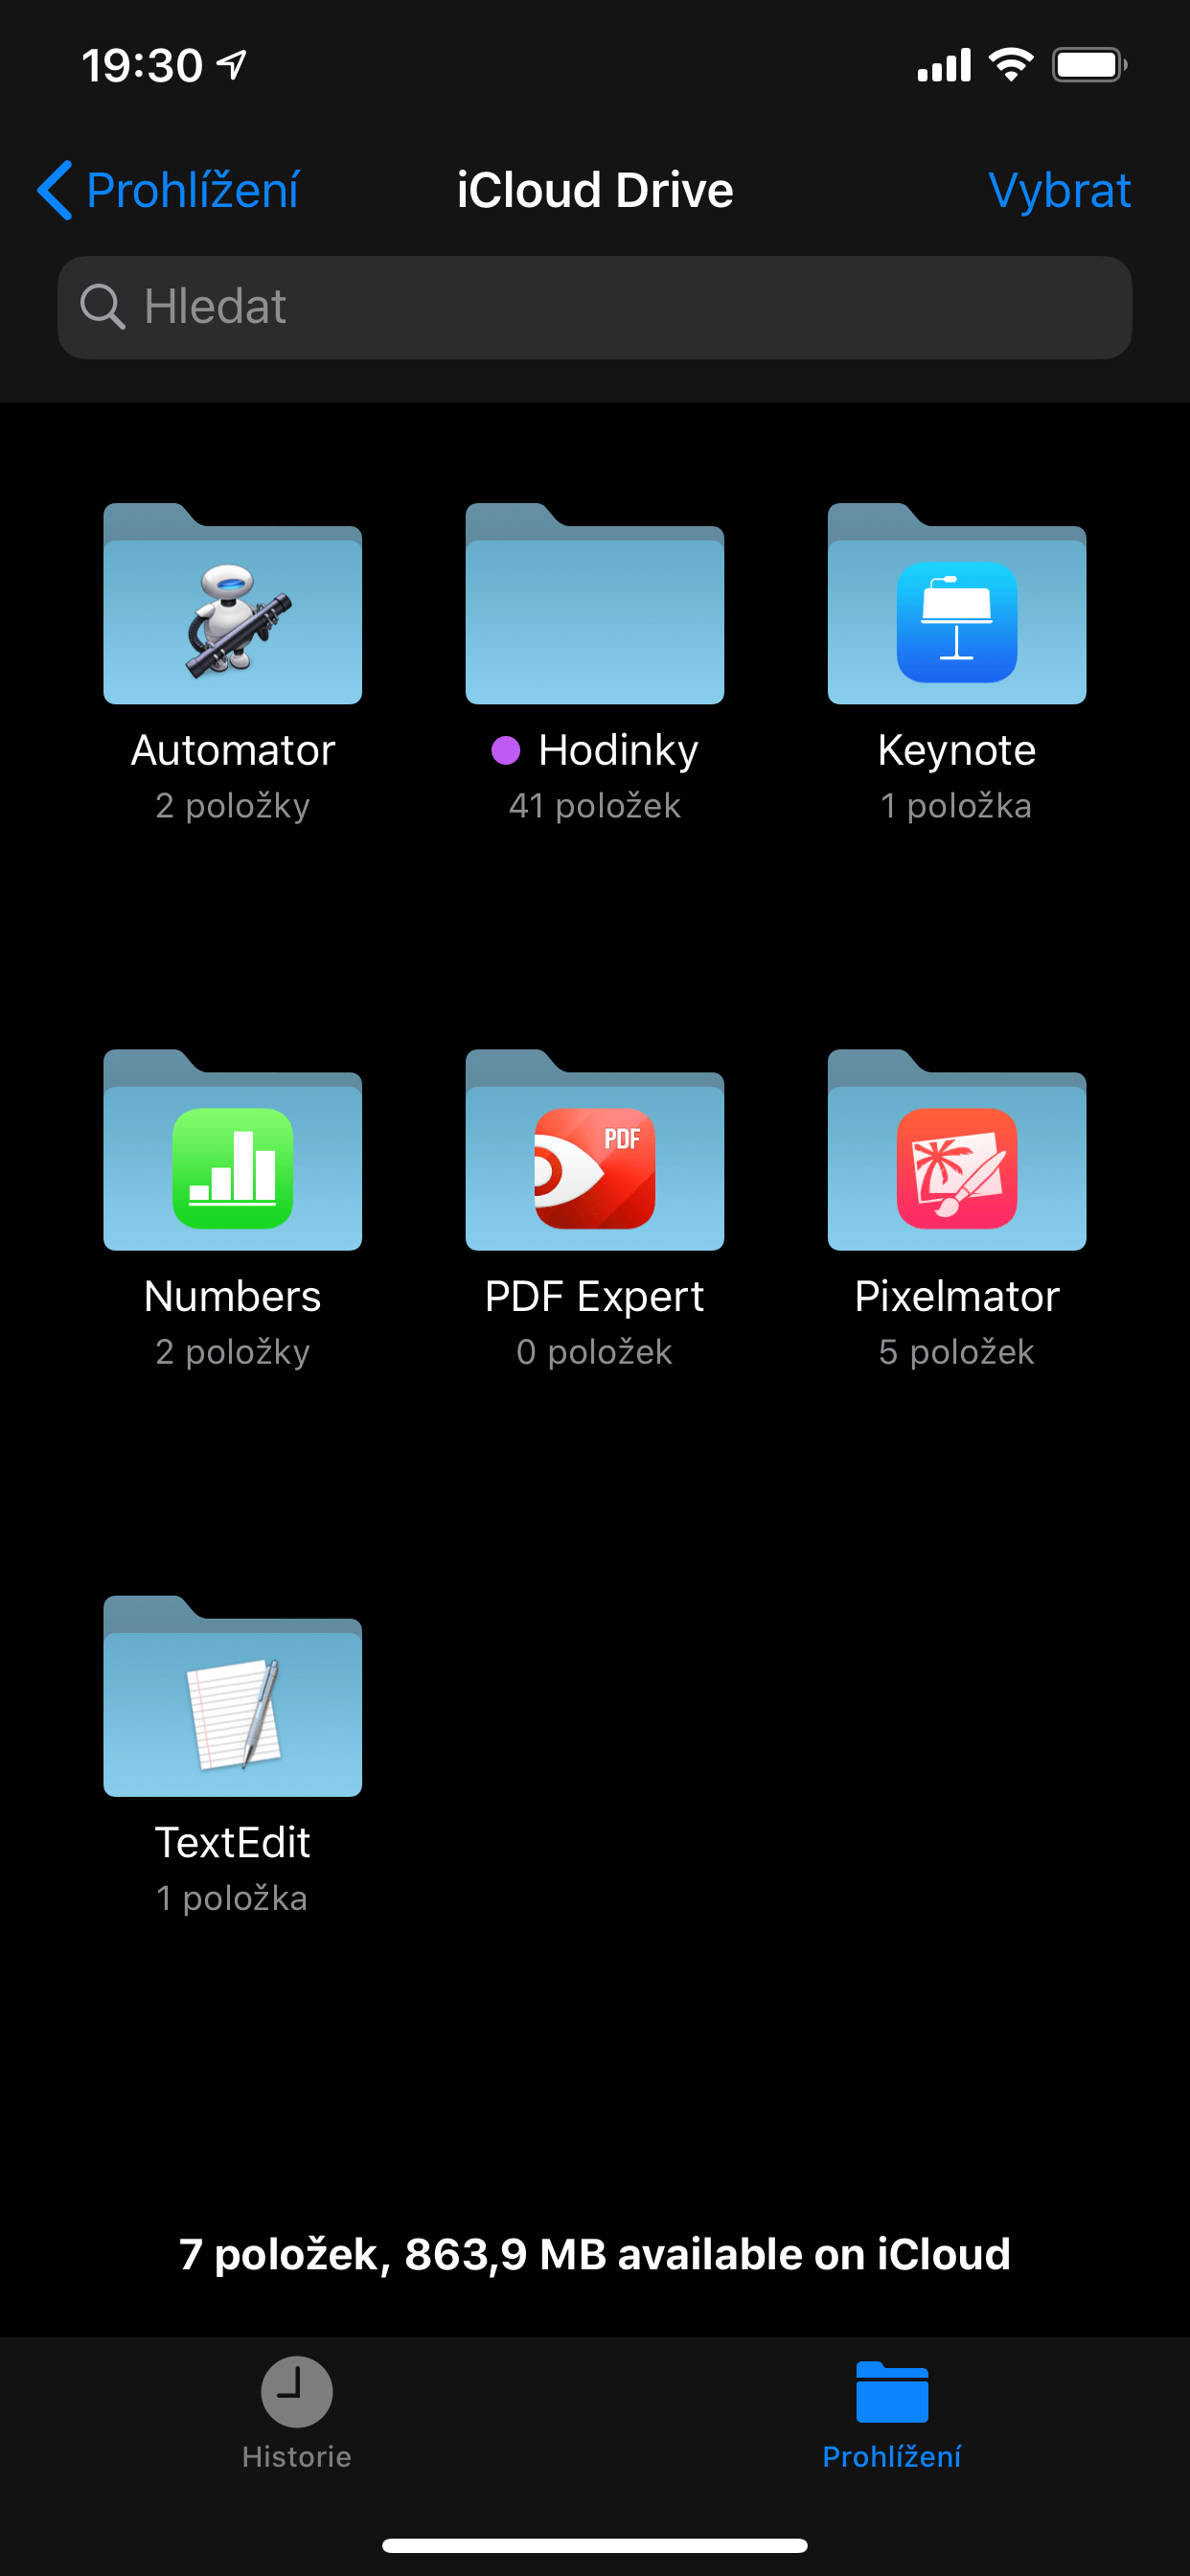
On an iPhone, iPad or iPod touch, go to Settings -> your name (at the very top), tap iCloud and turn on iCloud Drive. The Files app will appear on your Home Screen, and that's where you'll find all the files you have in iCloud. On older operating systems such as iOS 9 and 10, you'll find a separate iCloud section in Settings, where you turn iCloud Drive on. To see the Files icon on your Home Screen, you also need to select Show on Home Screen.
A few taps and iCloud is turned on. The Files icon then appears on your Home Screen, where you'll find all the data you have in iCloud.
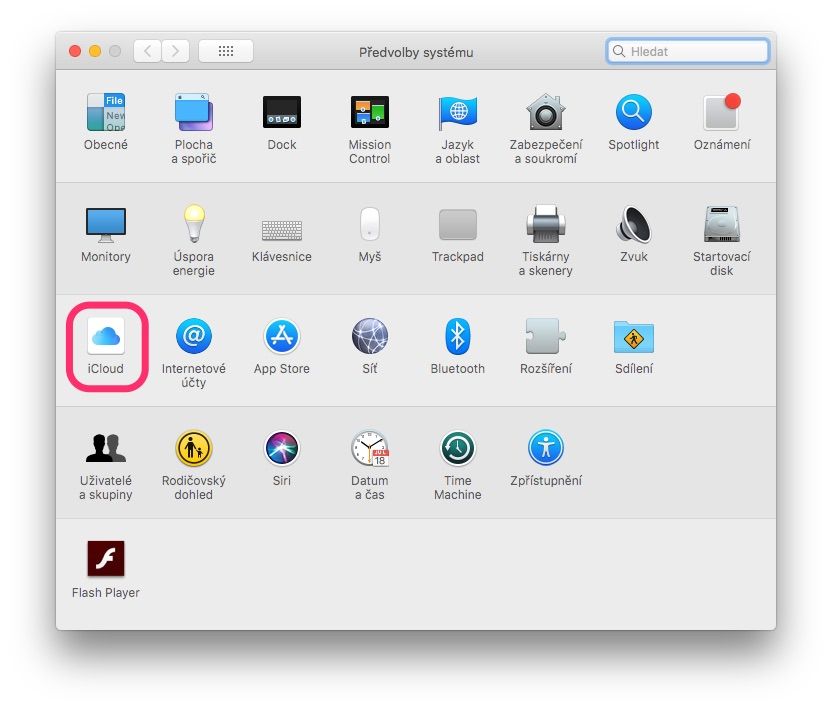
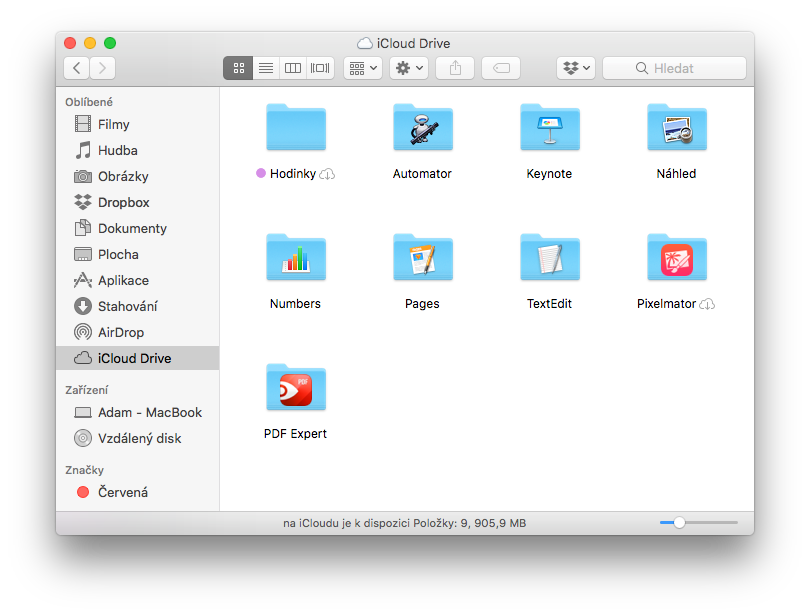
On a Mac, go to System Preferences and click Apple ID. If you're using macOS Mojave or earlier, you don't need to click Apple ID. Select iCloud and, if necessary, sign in with your Apple ID. Then simply select iCloud Drive. Once you've done that, an iCloud Drive item appears in the Finder. You can work with it just like any other folder, the only difference being that the data you drag into it is automatically uploaded to the server. You can then view that data on an iOS device too, and vice versa.
Once iCloud Drive is turned on on your Mac, you'll see it in the Finder as well.
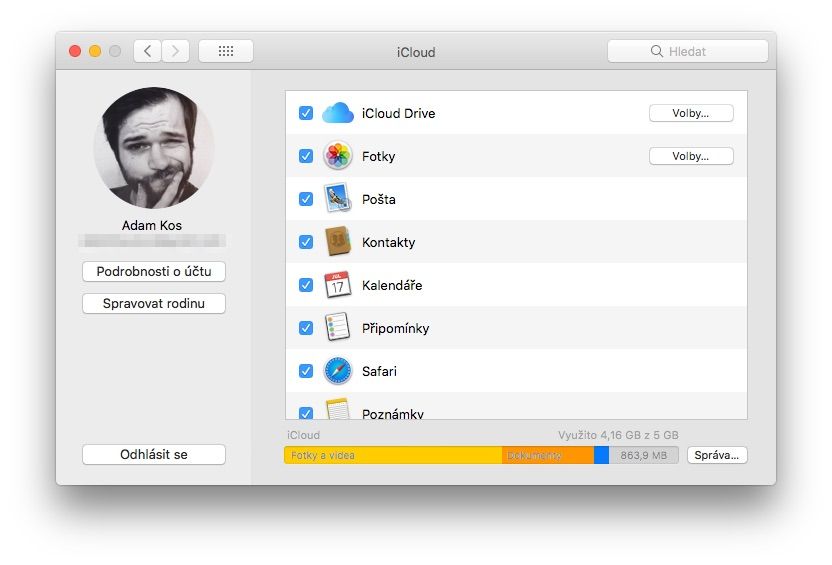
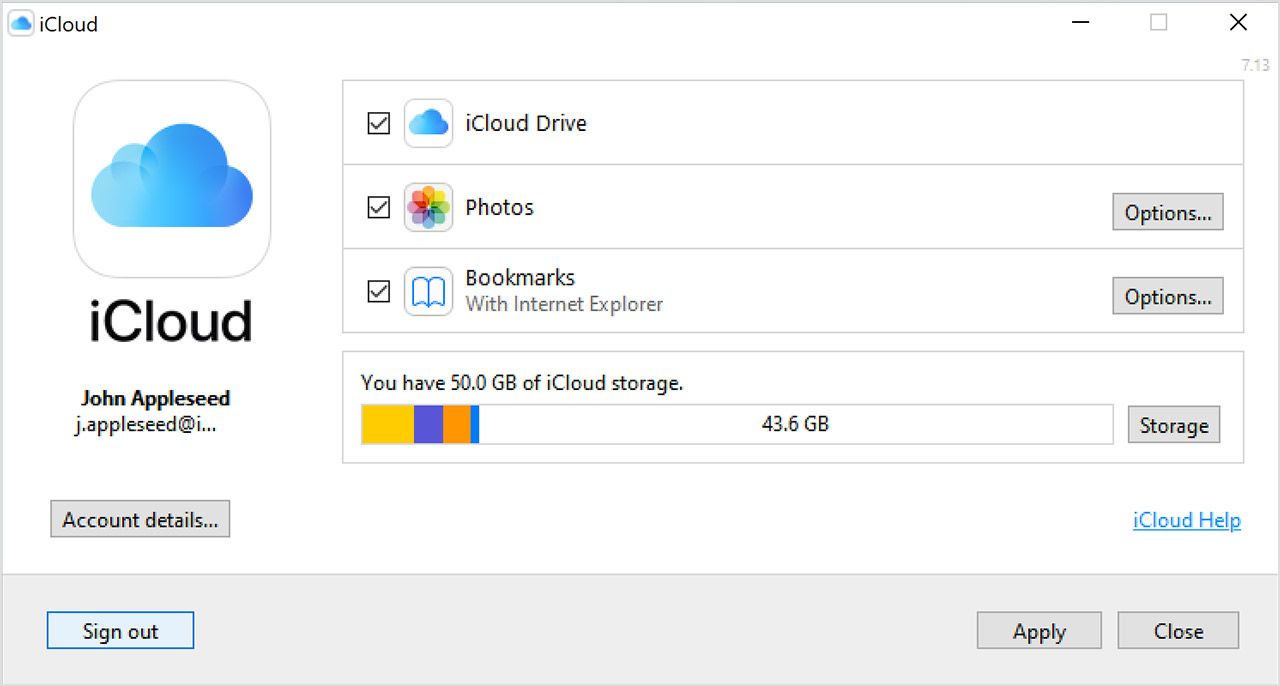
Once you've set up iCloud Drive on your iPhone, iPad, iPod touch or Mac, you can also set it up on a Windows PC (or in Windows virtualised on macOS). Go to the Start screen, open Apps or Programs and launch iCloud for Windows. Enter your Apple ID to sign in to iCloud, select iCloud Drive and click Apply. On the web at iCloud.com, all you need to do is sign in with your Apple ID and you'll see everything you have synchronised with iCloud.
If you download the iCloud for Windows app, you can use Apple's cloud on that operating system too.
However, Apple gives you just 5 GB of iCloud storage for free. If that isn't enough for you – and for any larger backup it won't be – you'll need to upgrade your storage. There are several plans, which you pay for as a monthly subscription. The prices are far from steep, though, and the space is fairly generous – not least because it works with family sharing. In other words, one person pays for the subscription and everyone in the family uses the space.
Figure 7: On iOS, you'll find the option to upgrade under Settings -> your name -> iCloud -> Manage Storage -> Change Storage Plan. 200 GB for 79 Kč a month looks like the ideal choice.