
We've known Touch ID since the launch of the iPhone 5s, the first device on which Apple introduced it. Apple went on using it in iPhones up to the iPhone 8/8 Plus generation, and we come across it in iPads too – with the exception of the latest Pro models from autumn 2018, where the American company has already built in the newer Face ID.
It's fair to assume that at most one more iPhone model will bring Touch ID, namely the rumoured SE 2; otherwise, with the X, XR, XS and 11 generations Apple has already moved to Face ID facial recognition. The reason is simple. The bezel-less display is behind it all, which is why we probably won't see a fingerprint reader in any future generation of iPad Pro either. Even so, Apple is still sticking with Touch ID – on the cheaper iPads and in MacBook portable computers, specifically the Pro and Air models.
For MacBooks, you have guru specialists at your service – appleguru.cz
Using Touch ID on a Mac
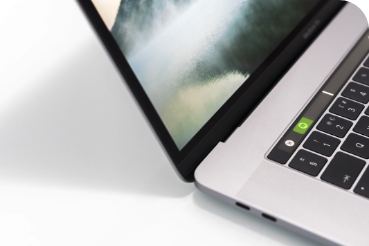
On MacBook Pro models with a Touch Bar, the Touch ID button is on the right-hand side of this touch strip above the keyboard. On MacBook Air models from 2018 or later, the Touch ID button is to the right of the function keys. And what is it for? Primarily for unlocking the device, so you no longer have to type your password. But you'll also use it when shopping with your Apple ID and Apple Pay.
Keyboard layout of a MacBook Pro with Touch Bar.
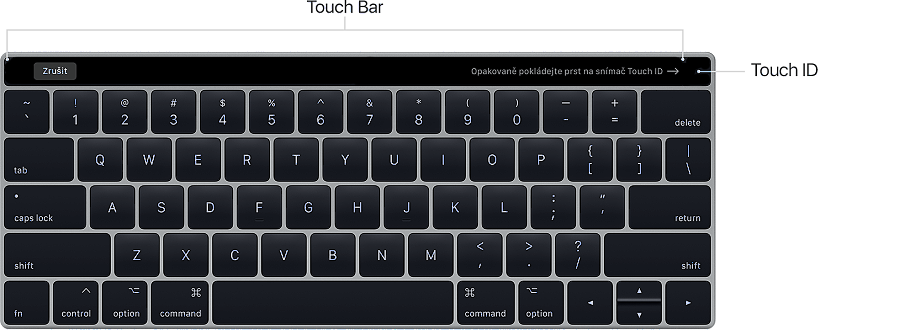
You turn on a MacBook Pro or MacBook Air by opening the lid or pressing Touch ID. Every time you start up, restart or log out, you'll need to log in to your user account. Once you've set up Touch ID, you can use your fingerprint instead of typing passwords for as long as you stay logged in. With Touch ID turned on, you can also use your fingerprint to make purchases in the App Store, the Apple Books Store and the iTunes Store, and on many popular websites that use Apple Pay.
Keyboard layout of the MacBook Air 2018 and later.
Setting up Touch ID
When setting up Touch ID, remember that your fingers need to be clean and dry. This prevents your finger from being scanned incorrectly. The same applies when you use it. If your fingers are dirty, Touch ID may not read your fingerprint quite correctly. In the end, though, all that happens is that you're asked to enter your password.
To add your fingerprint to Touch ID, go to System Preferences and choose Touch ID. Click the plus symbol to add a fingerprint and, when prompted, enter your account password. Then follow the onscreen instructions. Also tick the boxes next to the Touch ID features you want to use on your Mac. This will speed things up for you in future, e.g. when signing in to various websites and so on.
Would you like to revive / speed up your MacBook, or find out how to save your MacBook's battery? Click the link.
Remember that your finger should cover Touch ID completely during the scan. While Touch ID is scanning your finger, don't press the button or move your finger. If it still doesn't work the way you'd like, try registering the print of a different finger.
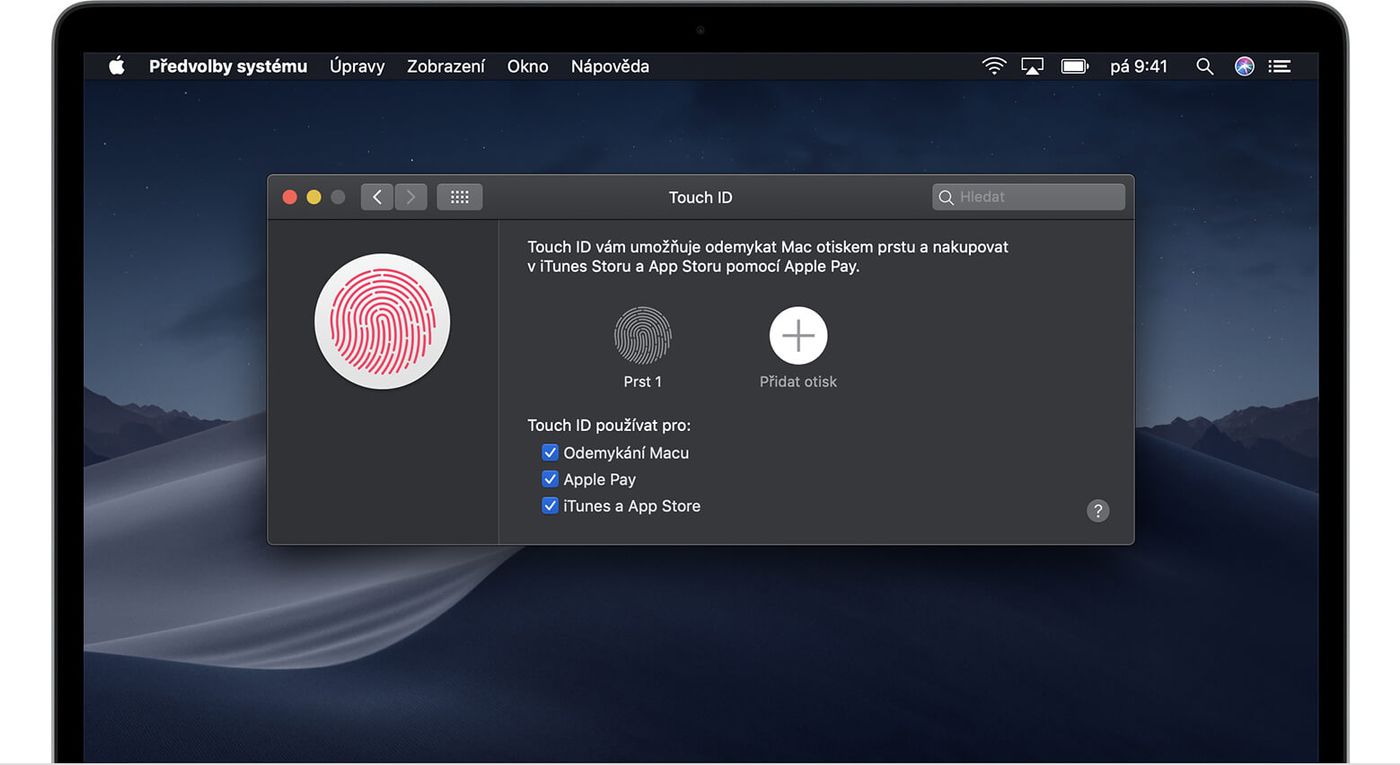
During the scan, rest your finger on the button but don't press it. Keep your finger in place until you're prompted to lift it. Keep placing and lifting your finger like this, changing its position on the button slightly each time. If you later need to delete a fingerprint, hold the pointer over the fingerprint and the option will appear. For the removal to go through, you'll be asked to enter your password.
Choosing a repair shop for your Apple device is an art – find out how to go about it in the article How to choose a MacBook repair shop
Unlocking your MacBook with Touch ID
Once you've set up Touch ID, you can use it to unlock your Mac. Wake it by opening the lid, pressing any key or tapping the trackpad, then log in by placing your finger on Touch ID. Of course, you still need your password, which you'll have to enter whenever you start up or restart the Mac or log out. After that, for as long as you stay logged in, you don't have to type it again and can authenticate quickly with Touch ID.
It's also used to unlock password-protected notes, the Passwords section of Safari preferences, and System Preferences. What's more, if several users use Touch ID on one Mac, they can use it to switch to their own account easily. All they have to do is press Touch ID, and the Mac automatically switches to the account of the user whose fingerprint it recognises.
Unlike on older Mac notebooks, holding down Touch ID on a MacBook Pro or MacBook Air doesn't bring up the Restart, Sleep and Shut Down options. You'll find these options in the Apple menu at the top left of the menu bar. If the Mac isn't responding, you can force it to shut down – hold the Touch ID button for six seconds. Bear in mind, though, that you'll lose all unsaved work.
You can't put the Mac to sleep with Touch ID either. For that, you again have to go to the Apple menu at the top left, where this option is found. If you like, though, on a MacBook Pro with Touch Bar you can add this option to the Control Strip (Finder -> View -> Customise Touch Bar).
Touch ID and shopping
When shopping on your Mac, you can use Touch ID instead of typing your Apple ID password. Just open the relevant store (iTunes Store, App Store, Apple Books Store) and click the Buy button next to the item you want to purchase. You'll then be prompted to use Touch ID, which you confirm by placing your finger on it.
With Apple Pay, you can also shop on the web on your Mac easily, securely and completely privately. This service never stores your payment card details, nor does it share them with merchants. First, though, you have to set it up. On Mac notebooks with Touch ID you'll be prompted to do so during initial setup. Just follow the onscreen instructions.
No copying out details, no typing in card numbers. Your fingerprint is all it takes and the purchase is paid for.
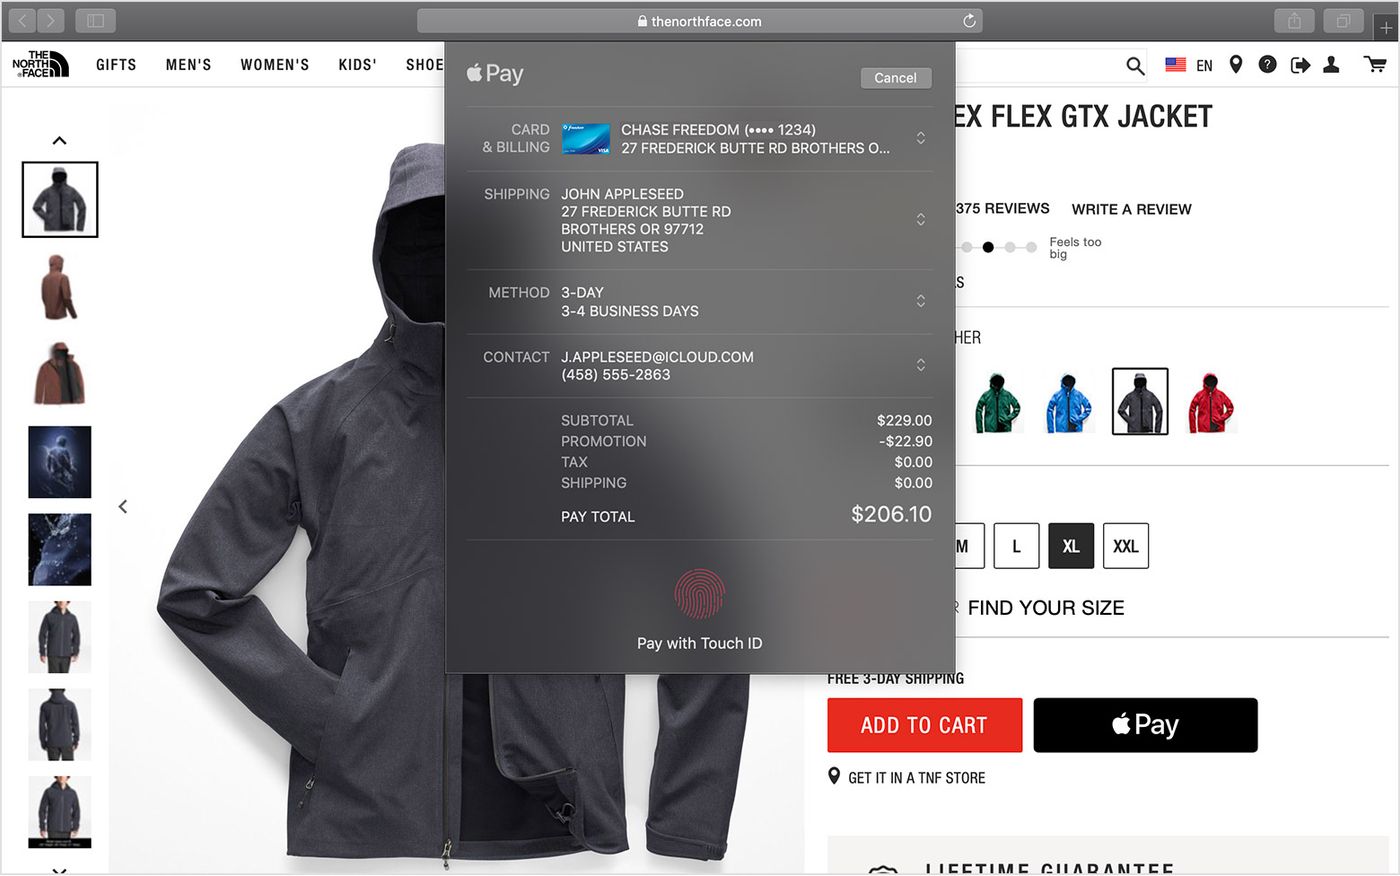
If you don't set up Apple Pay the first time you start your computer, you can set it up later in System Preferences under Wallet & Apple Pay. Here you can also check your transaction history and manage your payment cards. For example, you can add and remove cards and update your contact or delivery details.
On websites that support Apple Pay, click this very option when completing your order. When prompted, simply complete the payment by placing your finger on Touch ID. Yes, it really is that simple.
More technology, more options, more features
Touch ID can also be of use to people with a disability, however. Pressing it three times brings up the Accessibility Options window, while holding down the Command key and pressing Touch ID three times turns VoiceOver on or off. So Apple has implemented it in its MacBooks (so far only there) rather cleverly. It's therefore fair to assume that we'll keep coming across it for some time yet, because Face ID is, after all, more technologically demanding and more expensive. Besides, Apple's computers don't exactly excel in the quality of their webcams. And why should they, when we make all our video calls on our iPhones and iPads.
If you need help / advice, there's an Apple repair shop here for you – appleguru.cz